Installing Aristois to 1.19.3 snapshots
-
Disclaimer
This post covers how to install Aristois to the new 1.19 snapshot versions. Please note that snapshots are highly experimental and bugs should not be reported. To check if your snapshot is supported, please look here: https://gitlab.com/EMC-Framework/maven/-/tree/master/me/deftware/EMC-F-v2
Before you proceed there are a few things you should be aware of:
- Things may not work properly in Aristois
- It may be unstable, and prone to crashes
- Aristois will not auto update
This is bleeding edge software and bugs/crashes are expected, do not report them if you are using this, as this is highly experimental.
Written Guide
This guide will be using the version 22w44a as a reference, but is applicable to all snapshot versions.
⠀1. Download the version files.
To do this, copy the following link, but replace <version> with the snapshot version:
https://maven.aristois.net/manifest/<version>.zip(For donor version you can include ?donor=true)Examples:
https://maven.aristois.net/manifest/22w44a.zip?donor=true - Downloads donor version of 22w44a
https://maven.aristois.net/manifest/22w43a.zip - Downloads free version of 22w43a
⠀2. Place the version folder
After following step 1 you will receive a .zip folder that contains the version folder and a readme.
Open the
.minecraft/versions/folder and then open the .zip file. Drag the(version)-Aristoisfolder from the .zip into the versions folder.
⠀3. Create a profile in the launcher
Now it's almost ready, but you must first create a profile in the launcher.
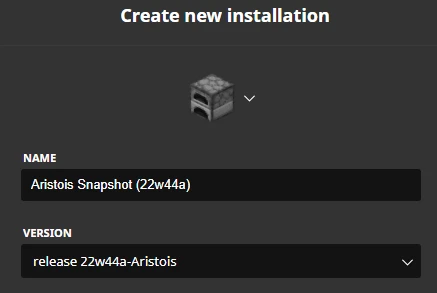
Open the launcher and click on "Installations", then select "New Installation". You can name the profile whatever you'd like. Change the "version" to the snapshot you want to use and then save.
⠀
4. Play!
That's it! The snapshot is now ready to play. Please note that you will get a warning saying that Aristois was unable to update. This is expected and can simply be ignored.
If you need additional help, please feel free to contact us.

 |
|